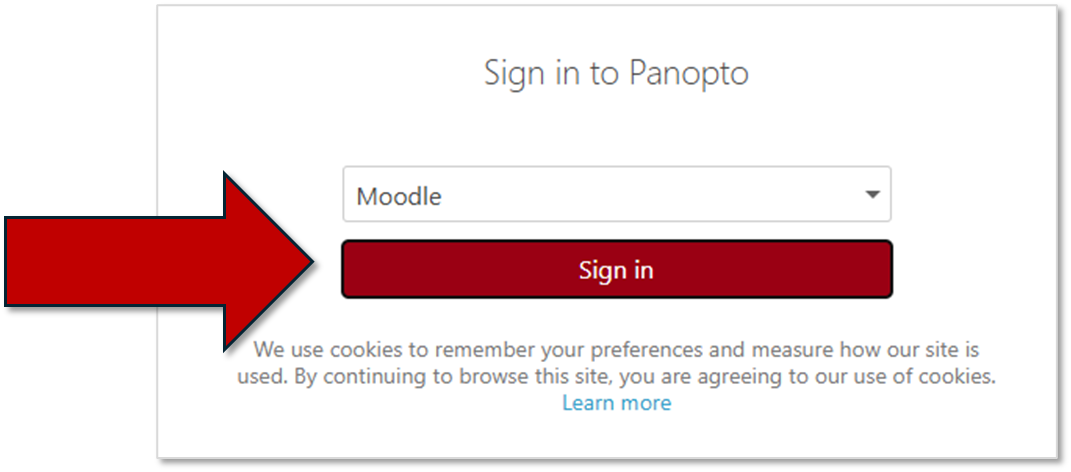
1. Log into your Moodle course, and click the URL the instructor has provided to upload your video. In the example below, the URL is named "Upload Your Persuasive Speech Video."

If prompted, click the red Sign in button.
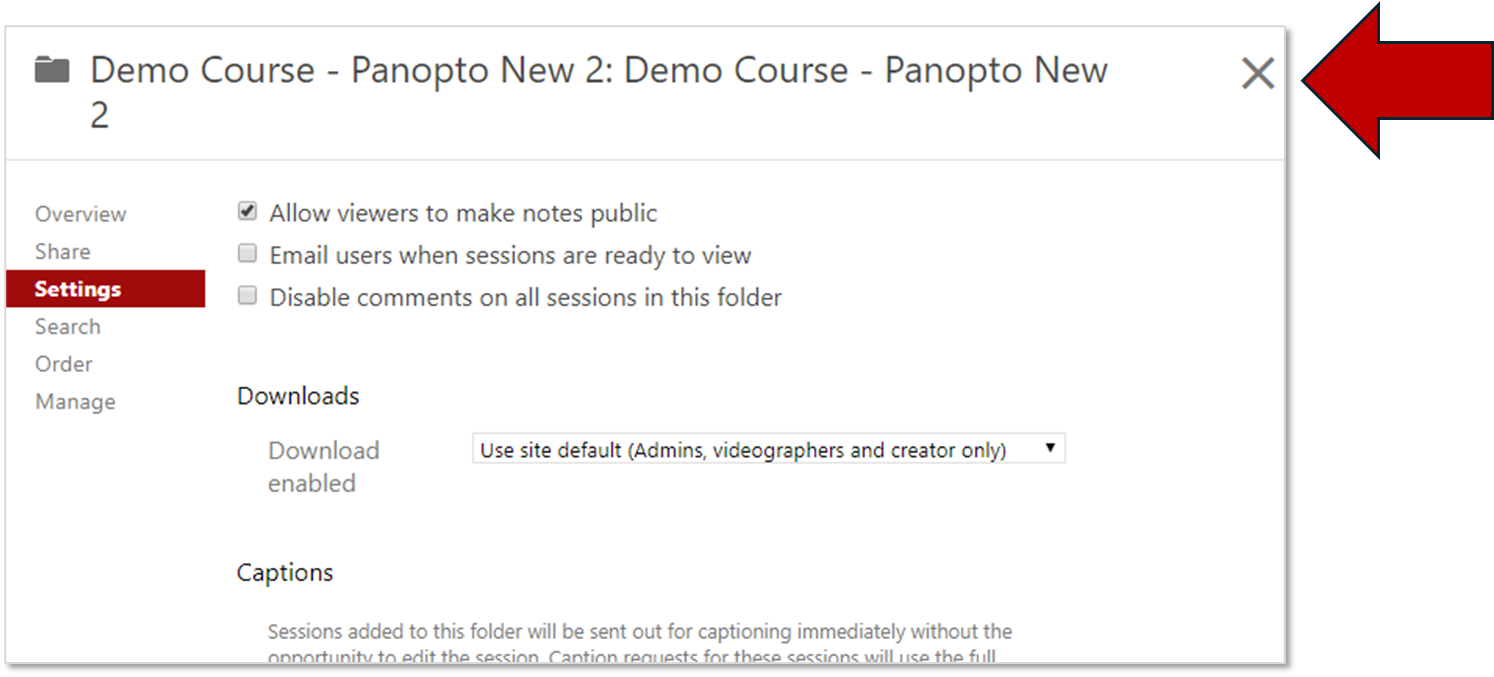
2. Close the settings screen that opens up by clicking the X in the upper right corner. This will take you to the Panopto Assignment Folder where you will submit your video.
3. Click on the red Create button at the top left of this page. You can either record a new video or upload an existing video using the following instructions:
To Upload a Video:
A. Click Create and select Upload Media.

B. Either click and drag your video file into the upload area, or click inside the upload area to open File Explorer on your machine to select the correct video file.

C. When the upload is complete, close this window by clicking the "X" in the upper right corner.

To Record a New Video
A. From the Panopto Home Screen set up by the instructor, find the Create drop-down menu, select Panopto Capture.

- Audio controls the sound input settings.
- Video controls the webcam settings (if desired).
- Screens and Apps control any screen or application capture during the video.
- Each browser causes different interactions with these buttons, so play with them until you get the configuration you wish.


E. Rename the video by highlighting the current name and typing in a new one. Hit enter on your keyboard when done typing.

