1. Click on the Examity link created in Moodle Link Setup.
2. Select the option to log in as an Instructor.
3. Click the Log in button.
4. Click on Courses/Exams.

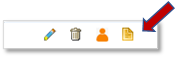
5. From the list of your courses registered with Examity, click the Add Exam icon (orange page) to the far right of the course in which you want to add an exam window.
6. Complete the Add Exam form.
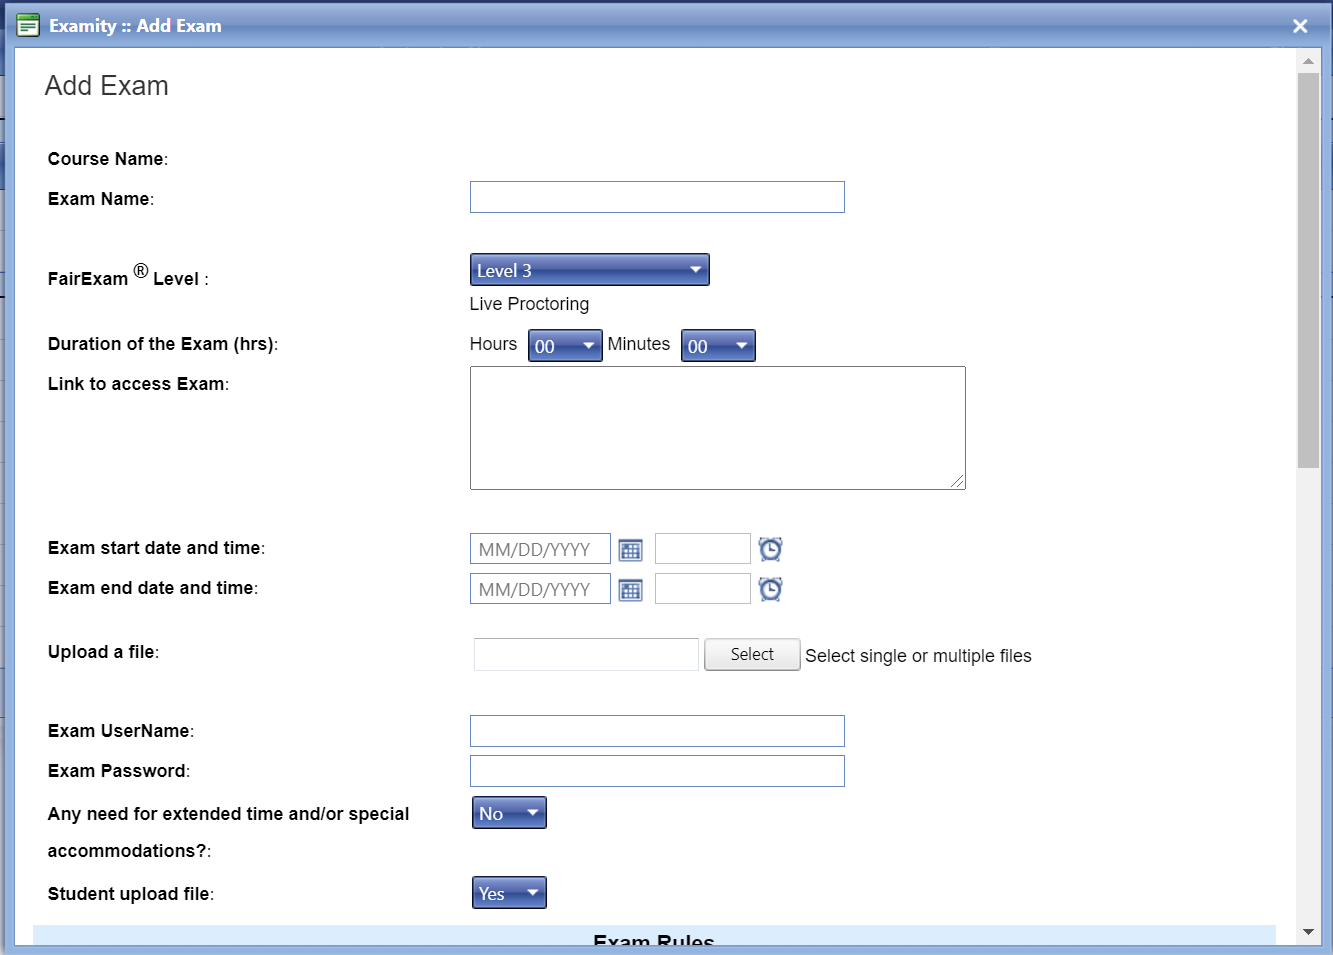
- Exam Name: enter name for exam
- Link to access Exam: enter exam URL
- Fair Exam Levels: Select Level 3
- Exam end date and time sets the last appointment time for students. You will need to factor in at least one hour plus the length of the exam to allow students plenty of time to complete the exam. Example: If you were scheduling a 1-hour exam that would close in Moodle at midnight, the final appointment time would be set to 10:00 p.m.
- Set a testing window of at least 24 hours which a student can schedule their exams. Shorter testing windows may result in students being unable to schedule a proctoring appointment at a convenient time.
- Exam User Name can be left blank.
- Exam Password must match EXACTLY the password set for the exam in Moodle or other, 3rd party testing site. Copying and pasting the password is recommended.
- Use the Additional Rules and Special Instructions sections at the bottom of the form to make specific adjustments to Examity's standard testing rules.
7. Once you have complete all fields on the form, click the Update button at the bottom.
8. Students will now be able to register and reserve their exam times.
Return to Faculty Faculty Examity Resources - Main