
1. Log into the Moodle course where you added a Panopto block.
2. Scroll down to the Panopto block.
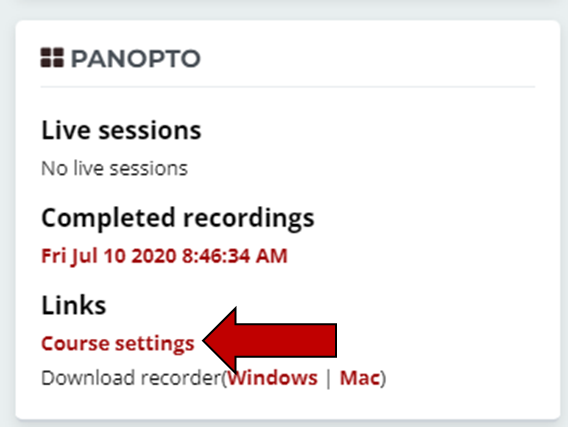
3. Under Links, Click on Course Settings.
4. The first page is always the Settings page. Click the X in the upper right corner to close this page. Closing the window will show the Panopto Home Screen.
5. From the Panopto Home Screen find the Create drop-down menu.

6. From the drop-down menu, select Panopto for Windows. This will launch the Panopto Recorder on your computer.
(If the Panopto Recorder doesn't automatically launch on this step, click the Launch Panopto button at the top of the Record a New Session popup screen.)

7. There are four main areas of the Panopto Recorder.

Arrow 1: The Name field allows you to change the name of the recording.
Arrow 2: The Record Button. When all settings are adjusted, click this button to begin, pause, or stop a recording.
Arrow 3: Primary Sources. Use this to control the webcam recording. If none is desired, use the Video dropdown to select None.
Arrow 4: Secondary Source. Use the checkboxes to select a screen or PowerPoint presentation to record. To preview the secondary source, click the checkbox Enable screen capture preview in the central part of the recorder screen.
8. Click on the Record button to begin recording, and click on the Stop button when finished.
9. In the popup, click Done, and the recorder will begin uploading this video to the Panopto Folder.

Next Steps
Return to the Panopto Home Screen and click Refresh on the browser to see the new video. From here you can: