The Choice activity allows instructors to ask a question with multiple responses as possible answers. Students can choose one or more options and they can update their selection if you allow them. Choices can be useful as quick poll to stimulate thinking about a topic; to allow the class to vote on a direction for the course, or to gauge progress.
Add a Choice Activity
1. On your Moodle course, click Turn editing on.

2. Click +Add an activity or resource in the section where you want to add the Choice activity.

3. In the Add an activity or resource window, select Choice. The Adding a new Choice page will open.
4. On the Adding a new Choice page, enter a name for the activity in the Choice name field, and enter the question that you want student to answer in the Description field.

5. Under the Options section, choose how the activity will behave:
- Allow choice to be updated: Allows students to change their choice after they submit a response. (The default is No, meaning that once a student saves their response they cannot change it.)
- Allow more than one choice to be selected: Allows students to select more than one answer
- Limit the number of responses allowed: Limit the number of students who can pick a particular choice. (Use this setting to setup a "sign up sheet" e.g., for group projects, presentation topics or lab sessions.
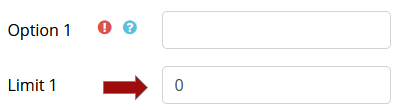
Note: When this option is selected, the Limit field becomes editable under each response option, allowing you to enter the number of students who can choose each response.

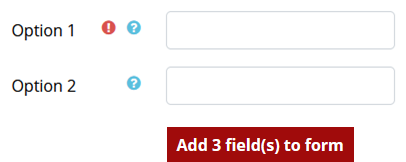
6. Then enter the text for each choice in the Option fields (Option 1, Option 2, etc). To add additional choice options, click Add 3 field(s) to form.
7. If you enabled the Limit the number of responses allowed above, specify how many users may choose each response option in the limit field below each option.
8. (Optional) Set start and end dates for when students can submit to the activity under the Availability section.

9. To show results to students, under the Results section, from the Publish results drop-down menu, choose one of the options below:
- Do not publish results to students: (default)
- Show results to students after they answer: Allows a student to see results only after they answer the question first.
- Show results to students only after the choice is closed: Allows students to see results only after the closing date/time specified under Restrict answering to this time period.
- Always show results to students: Allows students to see results even if they have not answered the question yet.

To limit which results students see when results are published above, from the Privacy of results drop-down menu, choose between:
- Publish anonymous results, do not show student names
- Publish full results, showing names and their choices

- To display a column in the results view showing who has not yet submitted, for Show column for unanswered, select Yes.
- To include responses from students who are no longer enrolled in your course, for Include responses from inactive/suspended users, select Yes.

10. Click Save and return to course button at the bottom of the page to return to the main course page.

View Choice Responses
1. On your Moodle main page, click the Choice activity to open it. The result page will open, showing the chart of answer choices.
2. Click View # response at top-right (# is the number of submitted responses). The Responses page will open, showing the answer choices, the number of students who picked each one, and, under each answer, a list of names of the students who picked that answer.

3. On the Responses page, download submitted responses in ODS, Excel, or Test formats.

Note: If you want to delete a student's response, select the checkbox to the left of a student's name, then select Delete from the With selected drop-down menu.
