The Database activity allows students and/or instructors to populate, display, search, and comment on a bank of record entries. The format and structure of these entries is highly customizable, with the option to include images, files, URLs, numbers, check boxes, and text. The Database activity well suited for many different kinds of assignments, such as collecting and sharing information, giving students a data array to work with, and presenting content for students.

Add a Database Activity
1. On your Moodle course, click Turn editing on.

2. Click +Add an activity or resource in the section where you want to add the Database activity.

3. In the Add an activity or resource window, select Database. The Adding a new Database page will open.

4. On the Adding a new Database page, enter a name in the Name field and provide instructions or background information for your students in the Description field (optional).

5. Adjust the Database settings in the Entries section.
- Approval required: If set to Yes, the entry will only be visible to everyone once the instructor has checked and approved it.
- Allow editing of approved entries: This option will be available if Approval required is set to Yes, which allows students who added their entries to edit or delete the approved entries.
- Allow comments on entries: Determine if you want to allow students to comment on each other's entries entries.
- Entries required before viewing: Determine the number of entries a student must add before they are allowed to see entries by other students.
- Maximum number of entries: Select the maximum number of entries a student can submit.

6. Adjust the database Availability settings.
- Available from/to: The dates the database is visible to students and new entries can be added.
- Read only from/to: The dates the database is available for viewing, but not open for data entry.

7. In Ratings section, determine how you will grade entries.
Database entries can be rated using a scale. Any ratings given are recorded in the gradebook.
- Roles with permission to rate: Identify users who have permission to rate items. This feature is not enabled until the activity is created. (Note: Once the Database activity is created, the list of roles may be changed via the permission link.)
- Aggregate type: Choose aggregate type from the drop-down list. The options are No ratings, Average of ratings, Count of ratings, Maximum rating, Minimum rating, and Sum of ratings.

8. Click Save and return to course button at the bottom of the page to return to your course main page.

Set up Entry Fields
1. On your Moodle page, click on the name of the Database activity.
2. Click the Fields tab in the Contextual menu.

3. From the Create a new field drop-down menu, select a field type. The types of fields possible are: Checkbox, Date, File, Latlong (latitude/longitude), Menu, Multimenu, Number, Picture, Radio button, Text area, Text input, and URL.

4. Configure the data fields according to the options provided and then click Add.
5. Use the Default sort field drop-down menu to choose the order in which fields will display in the database, and then click Save.

Define Database Templates
Templates for the Database activity allow you to control the visual layout of information when students are viewing, browsing, or editing database entries. To reduce setup complexity, we recommend creating all database fields before defining templates.
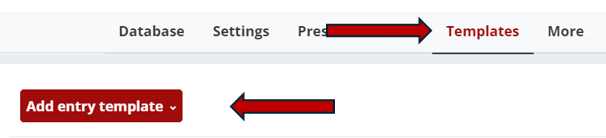
1. To set up your database template, click the Templates tab at the top of the page.

2. Click Save button at the bottom of the page.

Update Database Templates
If you want to make changes to the template that you created, you will need to reset the templates before the field displays to students. To update your database templates,
1. Open the Database page, and add and define new fields to use under the Fields tab.
2. Click Templates tab, then click the Add entry template tab.
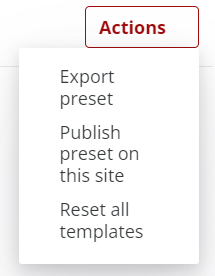
3. Select Actions to Export preset, Publish preset on this site, or Reset all templates (located on the right).
4. Click Save template button at the bottom of the page.

Note: You can repeat the steps above in the List template, Single template, and Advanced search template tabs. This will update the fields students see when browsing database entries, viewing one entry at a time, and searching within the database.
For details and instructions for your students on how to add entries to the database, see Add an Entry to a Database.