- Best practices for Securing your Zoom meetings
- Refer students to Student Zoom Resources
1. Click on the Zoom meeting link previously scheduled. See Schedule a Zoom meeting.

2. Start the Zoom Meeting. In the Upcoming Meetings tab, select the appropriate meeting and click on the Start button to open the Zoom meeting.

3. Waiting Room. At the scheduled meeting time, Admit users from the Waiting Room. By default, the waiting room option is enabled on all accounts. Participants will see the following message until you admit. Note: Turn off waiting room by the Security tab in the bottom menu and deselecting. Customize the Waiting Room instructions with title, video or image.

- Admit participants individually or Admit all. For more information, see Waiting Rooms.

4. Managing Roles. There are 4 different roles in a Zoom meeting. Host, Co-host, Alternative host, and Participants. See Roles in a Meeting.
- Host - There can only be one host. Hosts schedule the meeting and have full permissions.
- Co-host - Assigned during the meeting. Have most controls for monitoring the meeting. Co-host cannot start a meeting.
- Alternative host - Assigned when scheduling a meeting. Alternative hosts can start a meeting and have the same controls as a co-host. Note: Only Pro license ULID accounts are accepted as Alternative hosts. Students cannot be alternative hosts.
- Participants - will automatically placed in the waiting room.
4. Change Roles in a Meeting. Click Participants at the bottom of the screen to bring up Participants menu, select the More button next to the Participants name, and change their role.

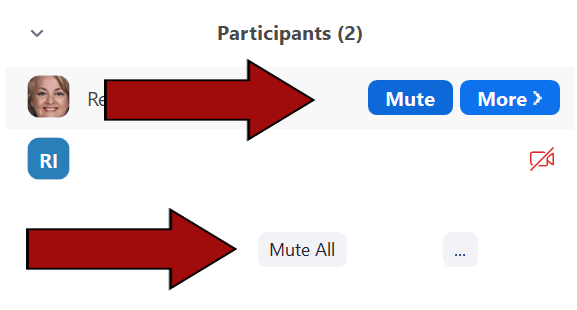
5. Mute/Unmute All. Open the Participants panel to Mute individual participants, select the Mute option next to their name. To Mute All participants, select Mute All at the bottom of the Participants panel.
6. Share Screen. See Share Screen for more information.
7. Polls. See Zoom Polls for more information.
8. Break-out Rooms. See Zoom Breakout Rooms for more information.
9. Closed Captioning/Live Transcription. See Closed Captioning/Live Transcription for more information.
10. Reactions. If available from the Settings menu from the Zoom Dashboard. Participants have the option of different non-verbal reactions. See Non-verbal and meeting reactions.

11. Recording. Select the Record option at the bottom of the Zoom screen. Recording to the cloud will be automatically available in the Zoom Dashboard, Cloud Recordings tab.

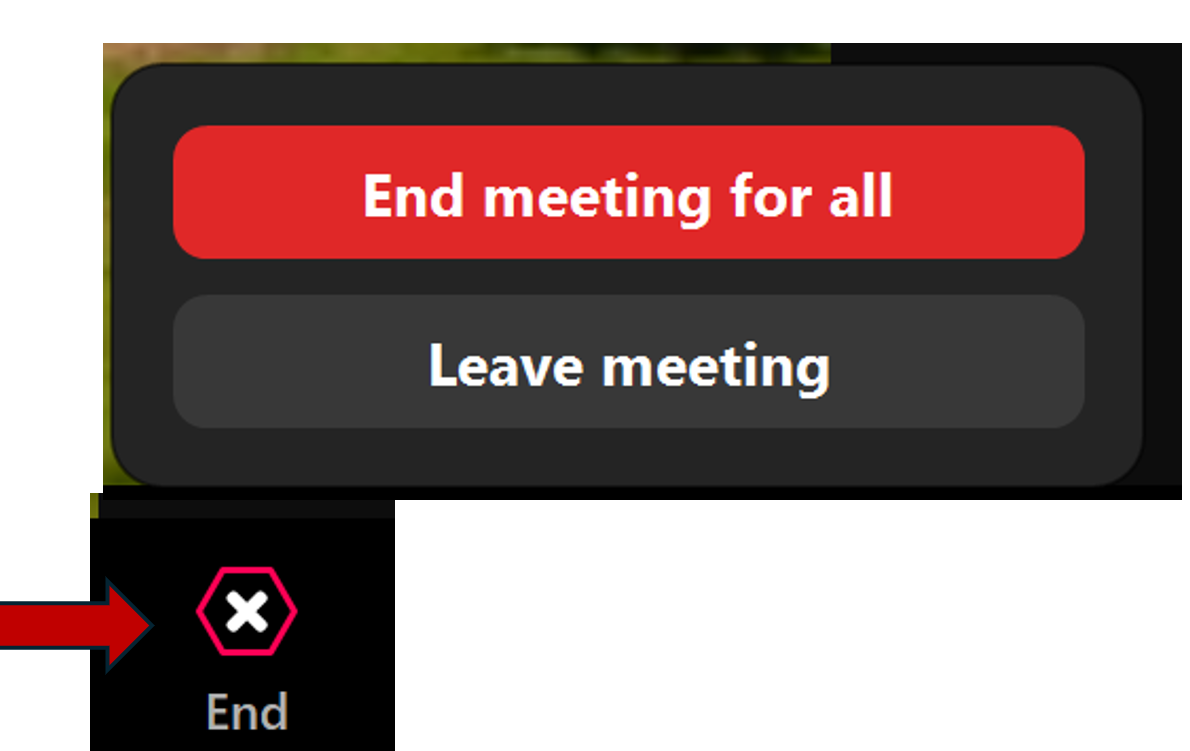
12. End Meeting. Select End to Leave meeting, Leave meeting for All - (only for hosts), or Cancel.
Return to Faculty Zoom Resources