Visit H5P.org - Timeline for more information.
What is Timeline
The Timeline content type allows you to place a sequence of events in chronological order. For each event, you may add images and texts. You may also include assets from YouTube, Vimeo, Google Maps, etc. This rich media object arranges all of your items in a specified order to explain complex events, evolutions and historical precedents related to your course content. Activity completion can be activated, Gradebook and Attempt options are not available.
Timeline Examples
History of Computers UL Lafayette Presidents History of Creative Commons
Get Started
1. Log into your Moodle course, select More from the Contextual menu, Content bank.

2. Click the Add button, find Timeline in the drop down menu.

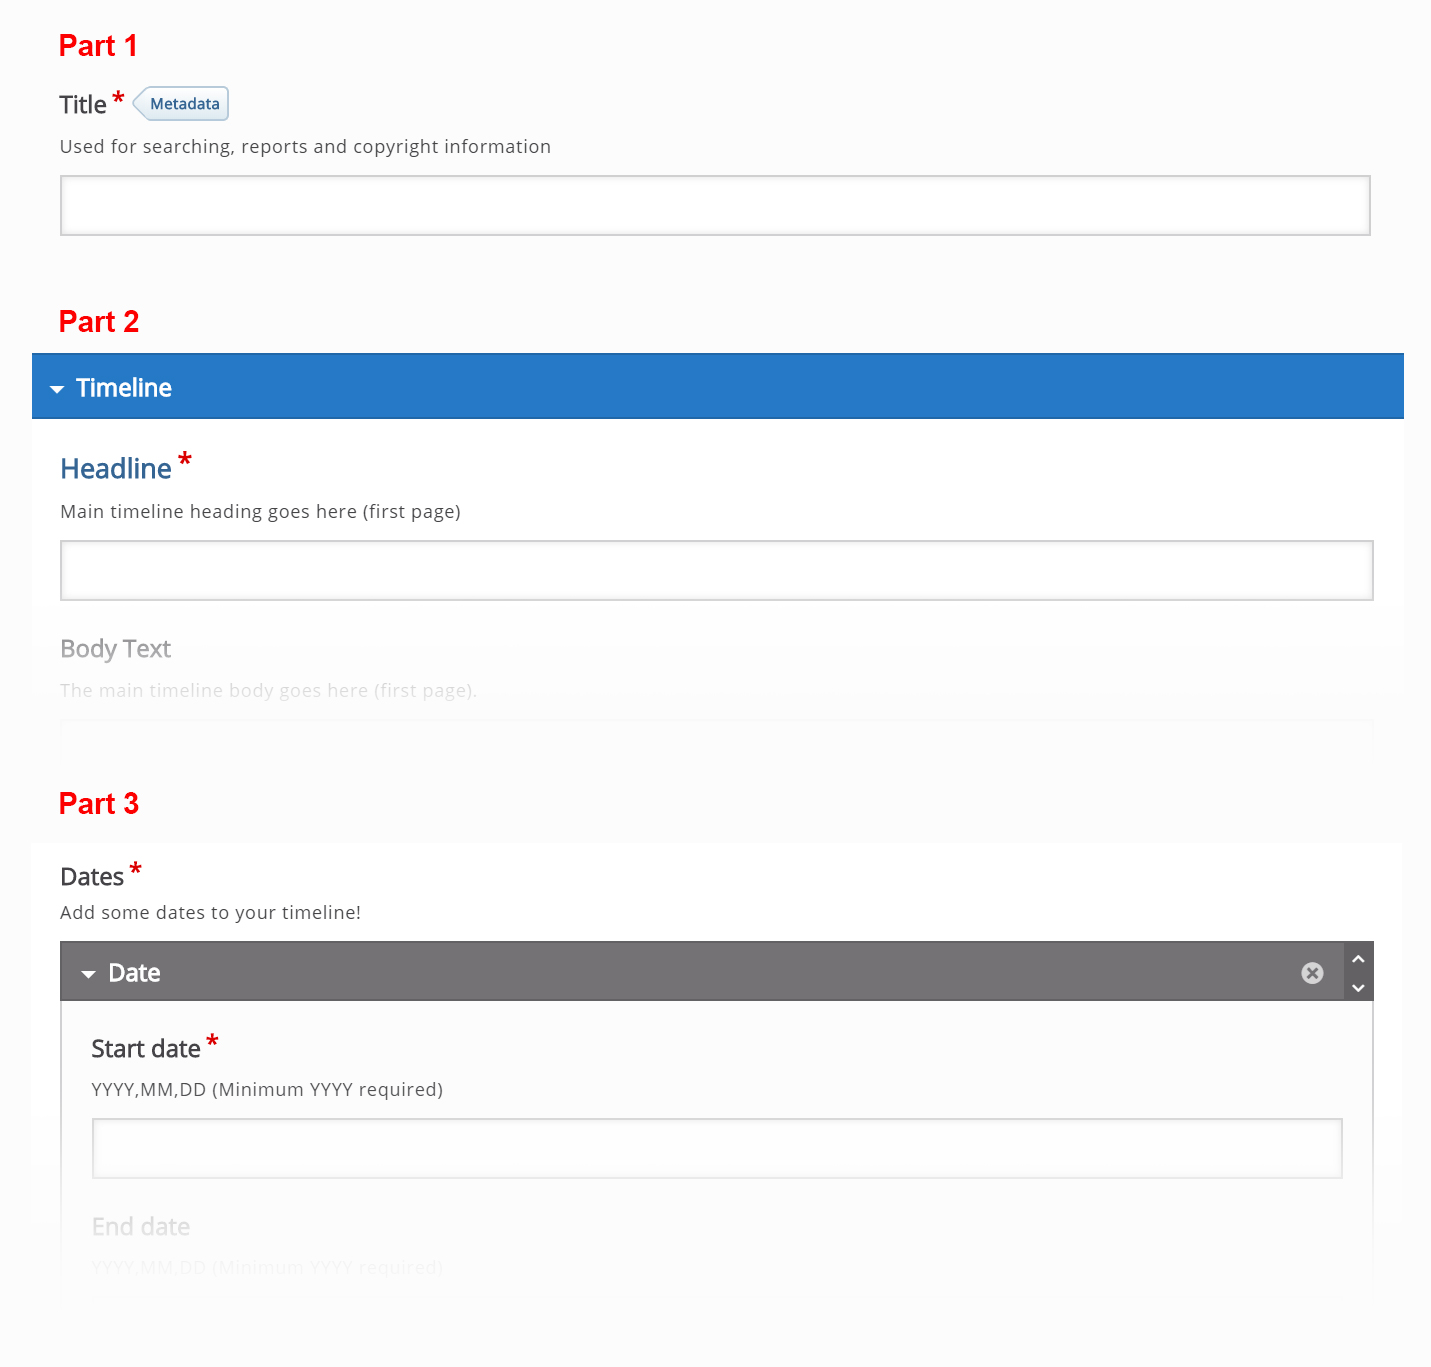
3. When the Timeline Editor opens, it consists of three main parts (Title, Timeline (Headline), Dates.
- The Title is the name of the entire Timeline,
- The Headline is content for the starting slide and overall settings for the entire timeline (example: background image, zoom, height).
- The Dates section consist of a start and end date, headline, body text, and media.
- Note: all media (graphics, video, etc) have to be linked via url: https://www....../..............jpg or https://youtu.be/..............
4. In the example Timeline, click on the Hotspots below to view the editor options for each.
6. Continue adding items (Dates) to the Timeline until all dates are entered. Note: Assets are optional media to add to the timeline.
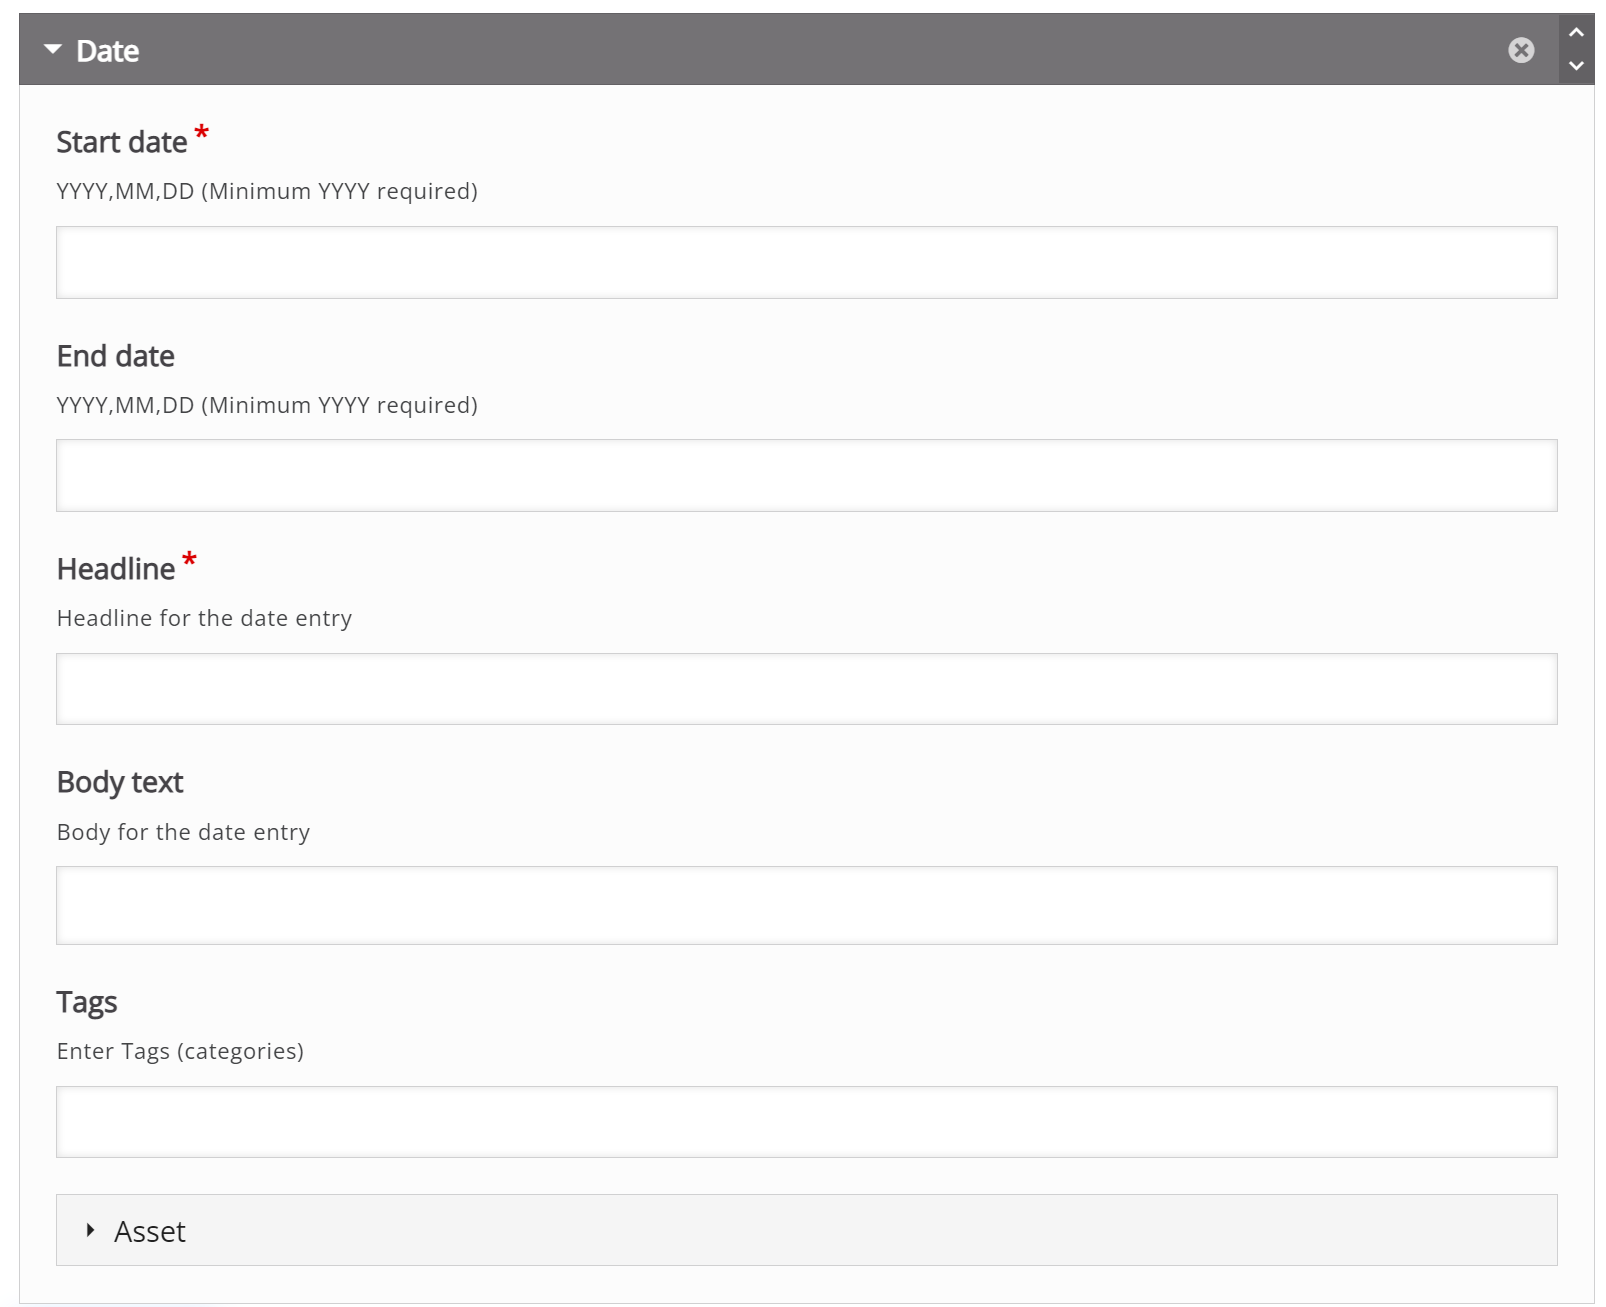
7. Optional: Eras or Language can be added to the timeline.

8. Save when complete. The timeline will live in the Content Bank until inserted into the Moodle Course.
Return to H5P Content Tutorials