The Moodle Scheduler helps you to schedule one-on-one appointments with all your students. You specify the periods during which you are available to see the students and the length of each appointment. The students then book themselves into one of the available timeslots.

Get started
Step 1 -
In the Moodle course, Turn editing on and Add an activity or resource, choose Scheduler and Add.

Type the name of the scheduler (can be changed later).

Review the options available. Note these options can be changed. If unsure of what an option refers to, click the blue "?" for a description. Review other options available, if needed.

Scroll to the bottom of the webpage and click the Save and Display button, which will display the "My appointments" screen.
Step 2 -
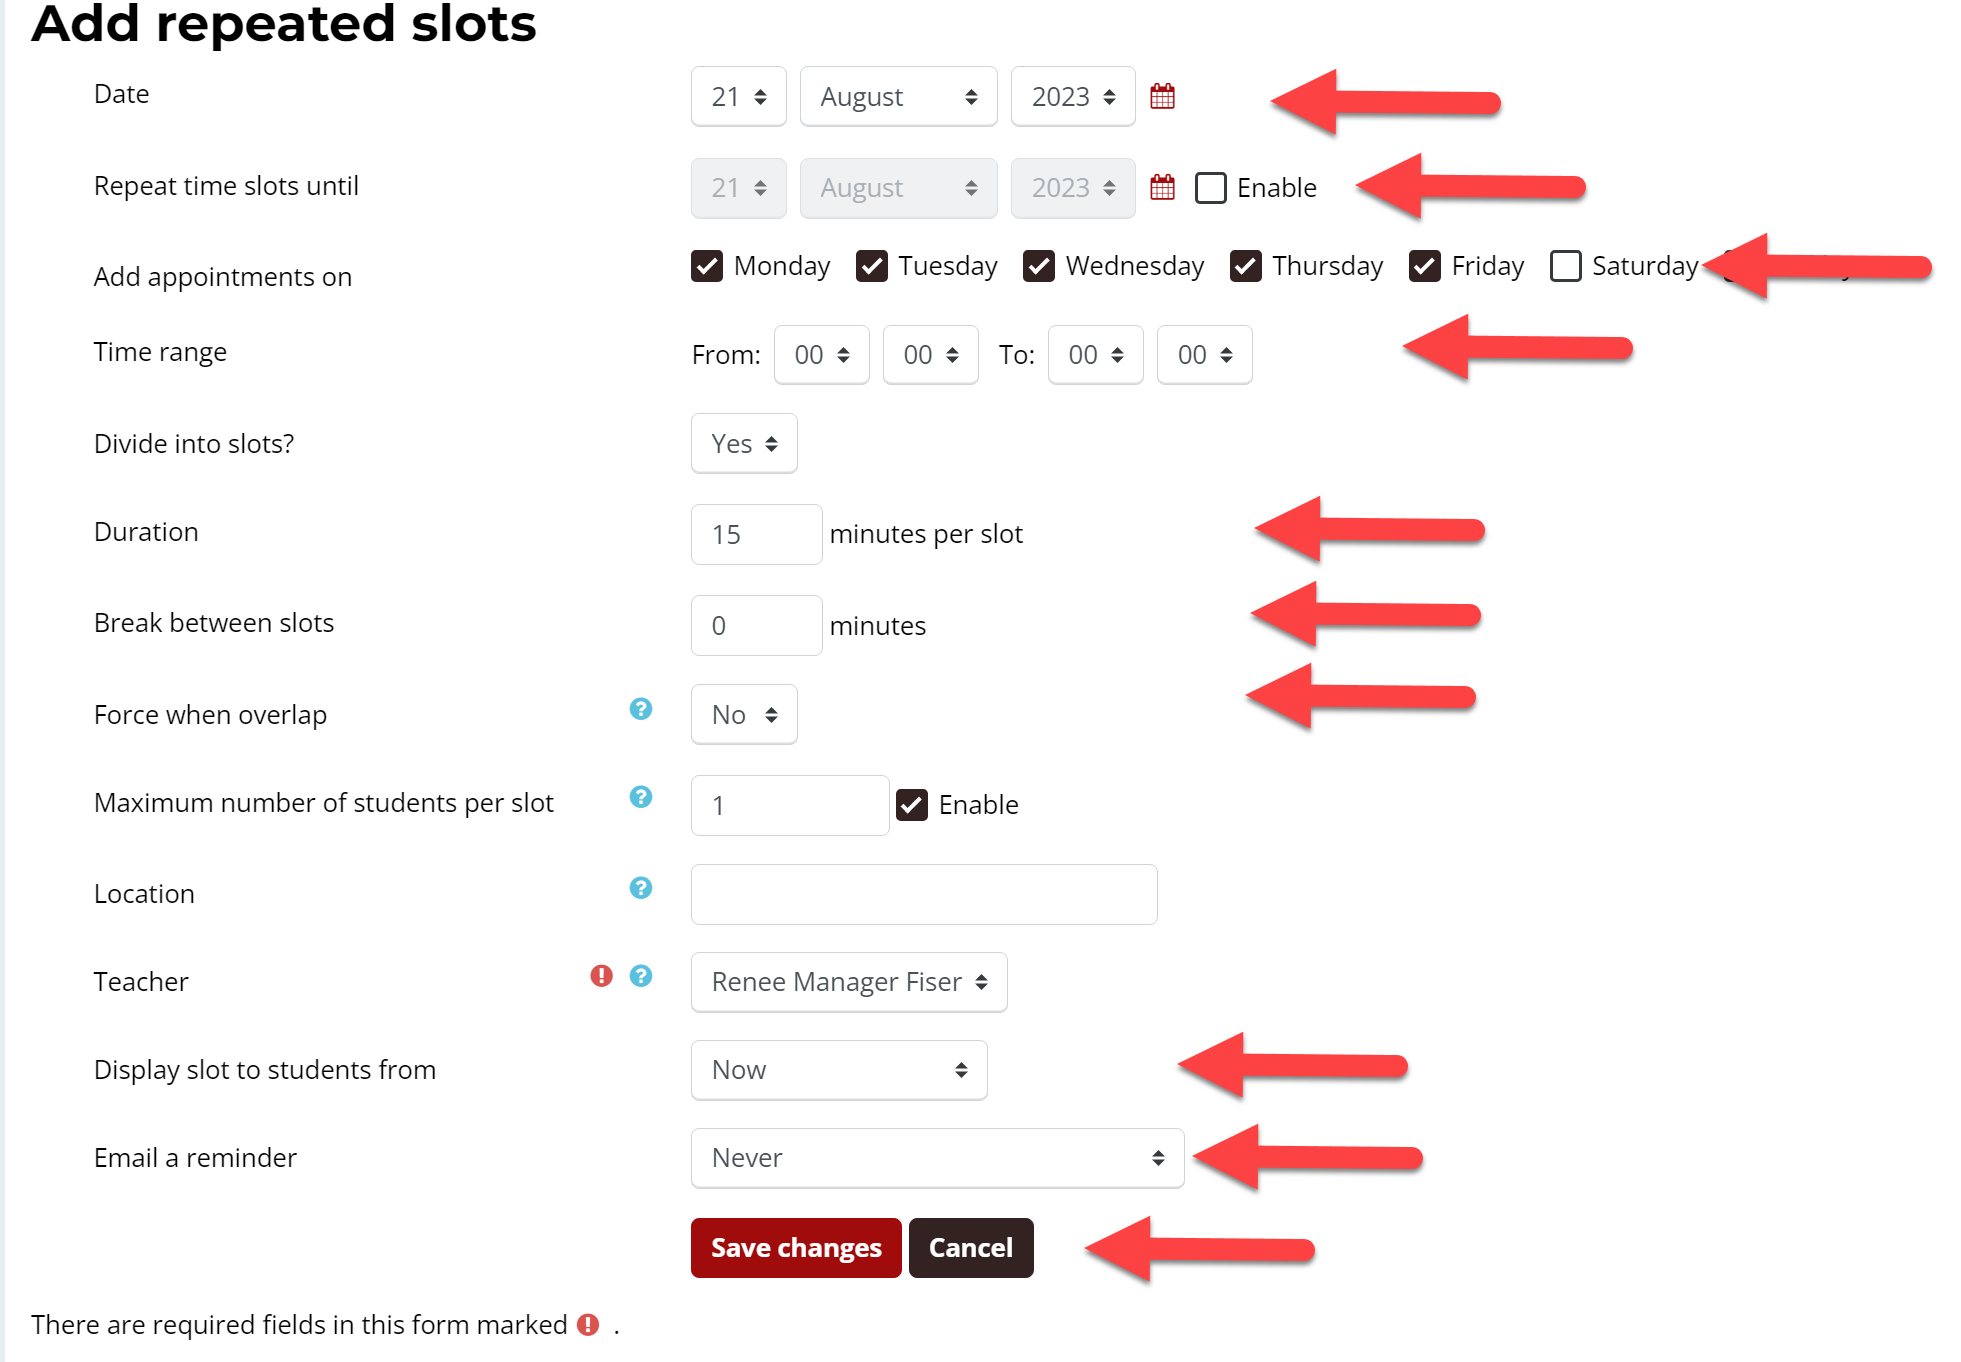
On this webpage with the name of your scheduler, click Add slots. Choose "Add repeated slots" or "Add single slots".

Complete the settings that will work for your schedule. Save changes when complete.
Step 3 - Once saved, you will see the time slots available and can make changes, as needed.

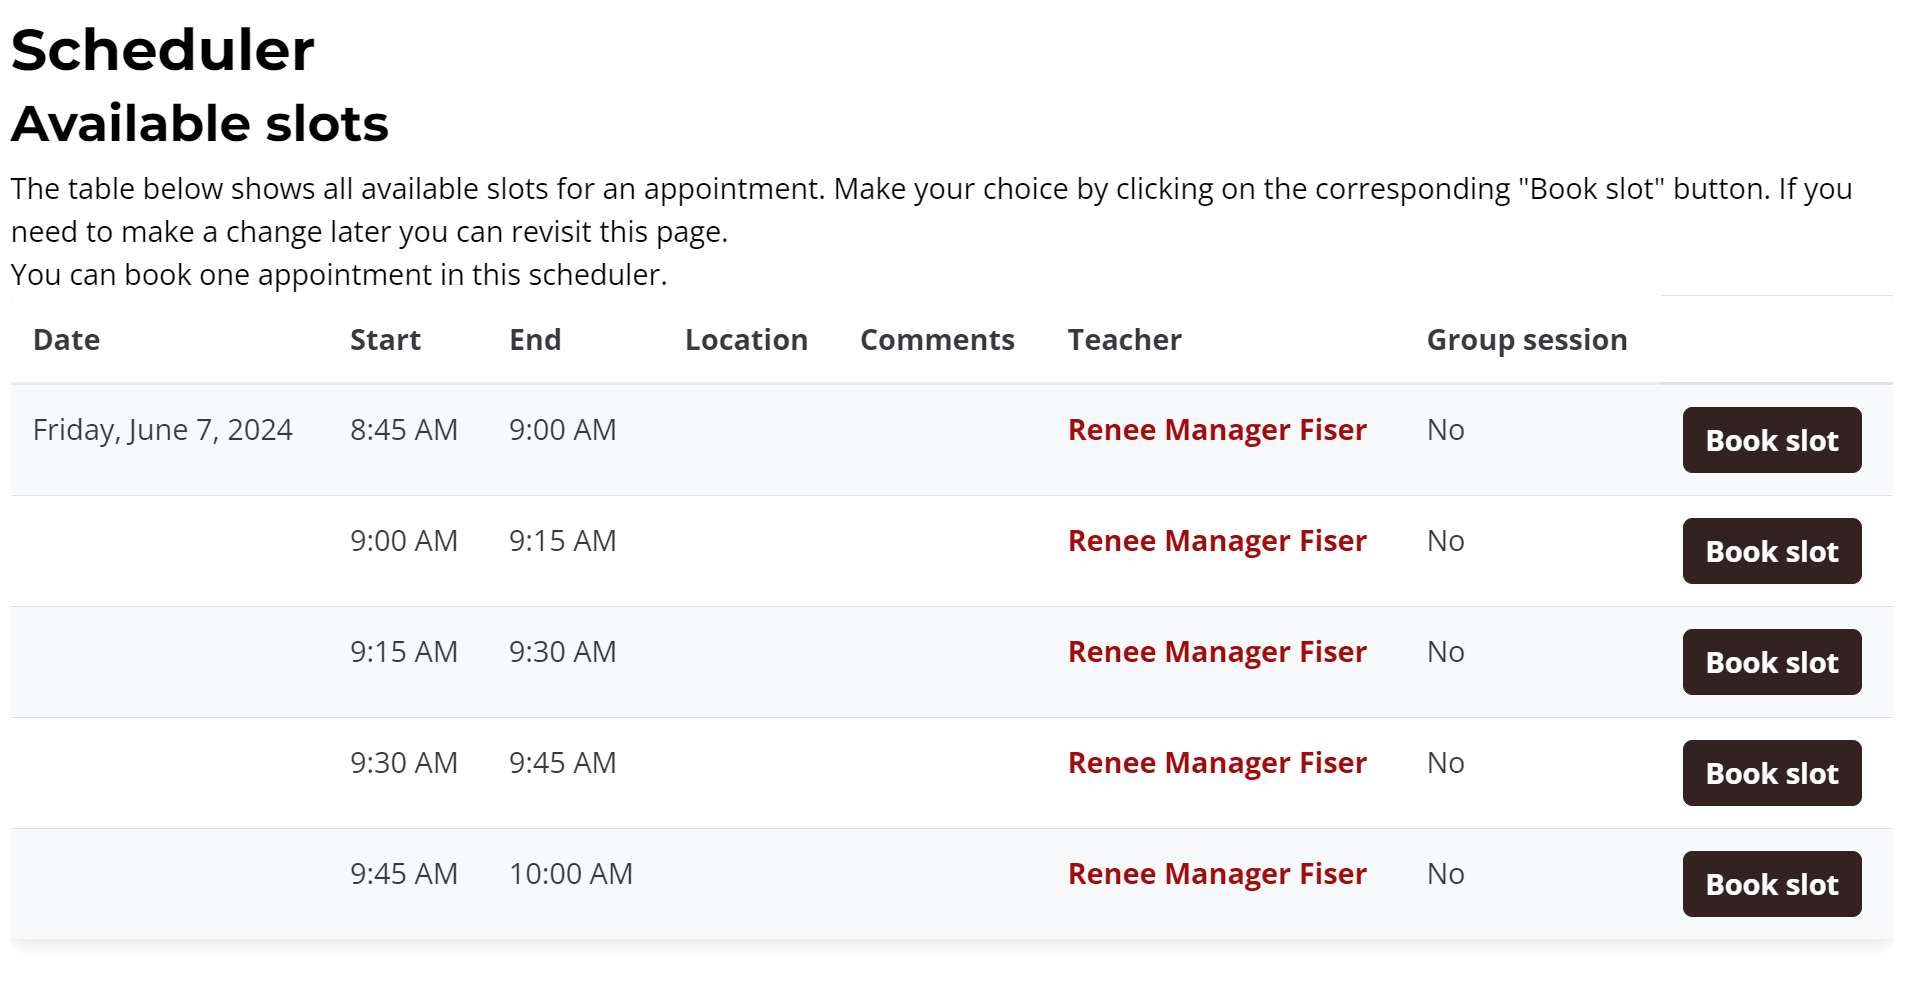
What students will see:
- Click on the Scheduler link in Moodle
- Pick a time to book a slot. Once booked, students will have the option of canceling and re-booking an available slot, if needed.
For more information about scheduling, review this Moodle document.